Elastic Stack을 이용 서버 모니터링 하기 (Elastic Search + Kibana + Metricbeat)
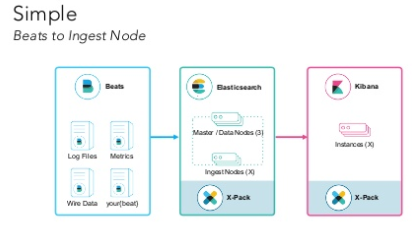
아래처럼 Simple한 구조로 서버 모니터링 방법을 구현해보겠습니다. (ubuntu 기준)

1. Elastic Search, Kibana의 설치/실행은 아래 글을 참고하여 진행하면 됩니다.
※ ‘ELK 설치/실행 (Elastic Search + Kibana + Logstash)’
2. Metricbeat 설치/실행을 합니다.
(https://www.elastic.co/guide/en/beats/metricbeat/5.5/metricbeat-getting-started.html)
2-1. Metricbeat 설치
$ curl -L -O https://artifacts.elastic.co/downloads/beats/metricbeat/metricbeat-5.5.1-amd64.deb
$ sudo dpkg -i metricbeat-5.5.1-amd64.deb
2-2. Metricbeat yaml 파일 생성
- 아래 localhost:9200 부분은 ElasticSearch가 설치된 호스트와 포트로 써주면 됩니다.
$ vi /etc/metricbeat/metricbeat.yml
#==========================  Modules configuration ============================
metricbeat.modules:

#------------------------------- System Module -------------------------------
- module: system
  metricsets:
    # CPU stats
    - cpu
    # System Load stats
    - load
    # Per CPU core stats
    #- core
    # IO stats
    #- diskio
    # Per filesystem stats
    - filesystem
    # File system summary stats
    - fsstat
    # Memory stats
    - memory
    # Network stats
    - network
    # Per process stats
    - process
    # Sockets (linux only)
    #- socket
  enabled: true
  period: 10s
  processes: ['.*']

#-------------------------- Elasticsearch output ------------------------------
output.elasticsearch:
  hosts: ["localhost:9200"]
※ output을 Logstash로 설정 할 경우 참고
(https://www.elastic.co/guide/en/beats/metricbeat/5.5/config-metricbeat-logstash.html)
2-3. Metricbeat 시작 (시스템 모니터링이기 때문에 권한을 sudo 권한 필요)
$ sudo /etc/init.d/metricbeat start
3. Kibana Dasboard로 확인
3-1. 기본으로 제공되는 Kibana Dashboard index pattern import
$ /usr/share/metricbeat/scripts/import_dashboards
3-2 Kibana 접속
(원격으로 putty 등으로 접속할 경우 터널링 필요)
http://localhost:5601 접속
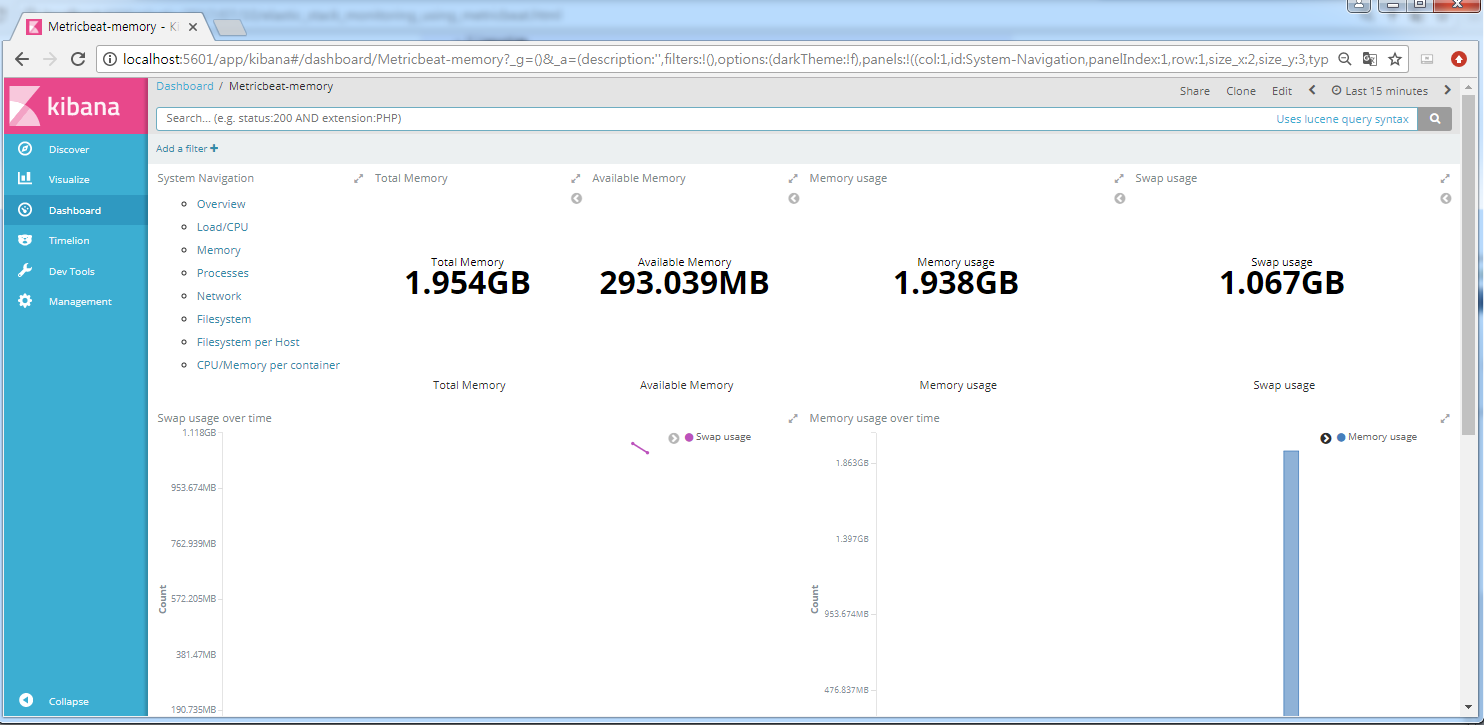
3-3. Dashboard 확인

참고 사이트
Elastic : https://www.elastic.co/guide/en/beats/metricbeat/5.5/metricbeat-getting-started.html
christoph-wurm(Elastic Solution Architecter) : https://www.slideshare.net/DevopsCon/using-elastic-to-monitor-everything-christoph-wurm-elastic-devopsdays-tel-aviv-2016